MicroPython(Esp32)
MicroPython IDE Link Esp32 Device Records
一、Esp32串口驱动
Esp32核心板 - CP210x USB至UART桥接VCP驱动程序
安装相应版本的驱动程序,安装完成后,左上方小黑苹果->关于本机->概览->系统报告->硬件->USB,查看是否安装成功如下图所示:
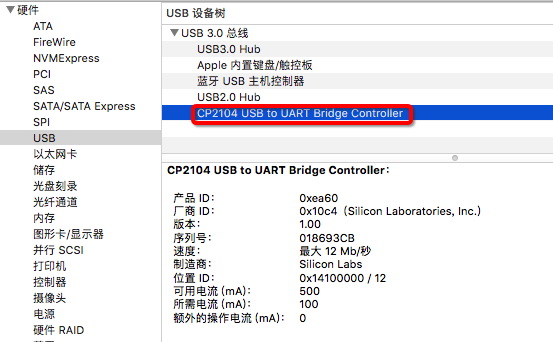
本篇文章以Mac OS 10.13.6为基础安装与运行环境
二、Terminal终端连接调试
打开终端进入/dev目录查看是否存在tty.SLAB_USBtoUART
cd /dev
ls

确认tty.SLAB_USBtoUART文件存在后,输入以下命令进行调试
screen /dev/tty.SLAB_USBtoUART 115200
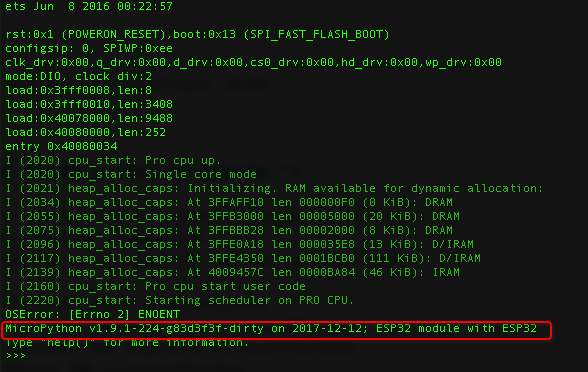
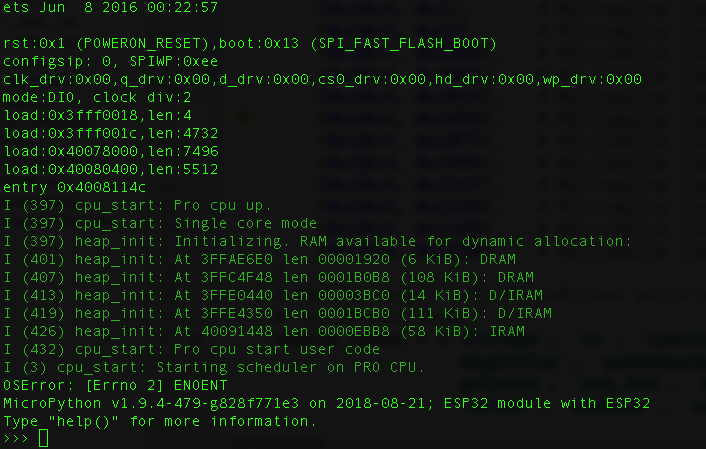
按下MicroPython开发板的Rest键,出现如下信息则表示连接成功,红色标记信息为硬件基本信息
三、IDE 连接Micropython(Esp32)
设置Esp32板硬件连接参数
name = _('Esp32 MicroPython')
    description = _("Use MicroPython on Esp32's line of boards.")
    icon = 'microduino'
    save_timeout = 0  #: Don't autosave on Microduino boards. Casues a restart.
    connected = True  #: is the Microduino board connected.
    force_interrupt = False  #: NO keyboard interrupt on serial connection.
    valid_boards = [

        (0x10c4, 0xea60),   # Microduino Esp32 cp2102 VID,PID
        (0x10c4, 0x1),      # Microduino Esp32 rst(POWERON_RESET)
        (0x10c4, 0x13),     # Microduino Esp32 boot(SPI_FAST_FLASH_BOOT)
        (0x10c4, 0x2020),   # Microduino Esp32 cpu_start(Pro cpu up,Single core mode)
        (0x10c4, 0x2021),   # Microduino Esp32 heap_alloc_caps(Initializing. RAM available for dynamic allocation)
        (0x10c4, 0x2034),   # Microduino Esp32 heap_alloc_caps(At 3FFAFF10 len 000000F0 (0 KiB): DRAM)
        (0x10c4, 0x2055),   # Microduino Esp32 heap_alloc_caps(At 3FFB3000 len 00005000 (20 KiB): DRAM)
        (0x10c4, 0x2075),   # Microduino Esp32 heap_alloc_caps(At 3FFBBB28 len 00002000 (8 KiB): DRAM
        (0x10c4, 0x2096),   # Microduino Esp32 heap_alloc_caps(At 3FFE0A18 len 000035E8 (13 KiB): D/IRAM
        (0x10c4, 0x2117),   # Microduino Esp32 heap_alloc_caps(At 3FFE4350 len 0001BCB0 (111 KiB): D/IRAM
        (0x10c4, 0x2139),   # Microduino Esp32 heap_alloc_caps(At 4009457C len 0000BA84 (46 KiB): IRAM
        (0x10c4, 0x2160),   # Microduino Esp32 cpu_start(Pro cpu start user code)
        (0x10c4, 0x2220),   # Microduino Esp32 cpu_start(Starting scheduler on PRO CPU.)
    ]
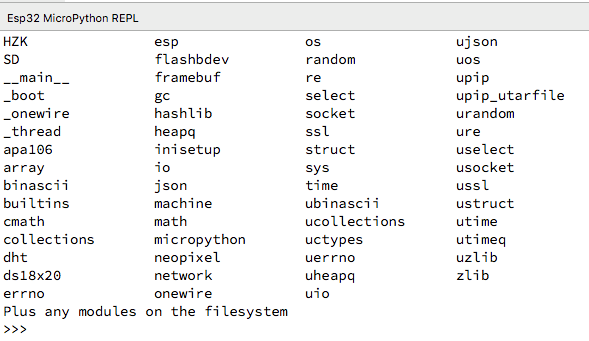
运行main.py 点击Serial进行连接,在REPL中输入hlep(‘modules’),出现如下信息则表示成功
四、烧录新固件
安装烧录工具esptool.py
pip install esptool
清除原有固件
esptool.py --chip esp32 --port /dev/tty.SLAB_USBtoUART erase_flash
此处以Mac OSX 系统为例,其中tty.SLAB_USBtoUART是USB串口协议
烧录新固件
esptool.py --chip esp32 --port /dev/tty.SLAB_USBtoUART write_flash -z 0x1000
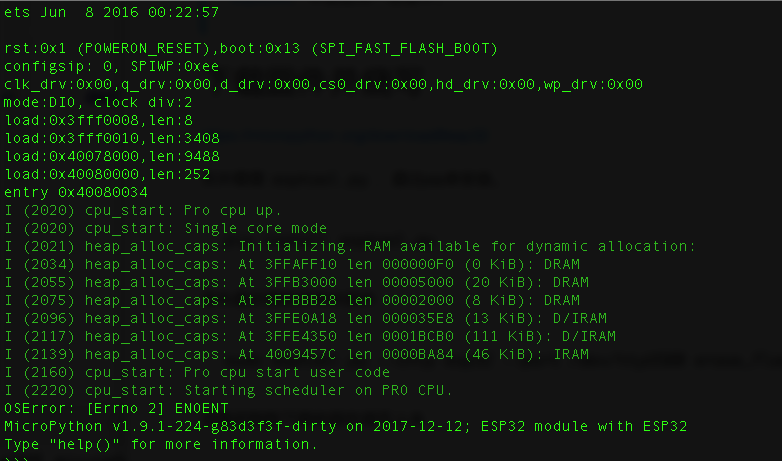
烧录前后固件信息对比
烧录前
烧录后
五、文件管理系统
安装ampy
pip install adafruit-ampy
在Esp32上运行代码
ampy --port /dev/tty.SLAB_USBtoUART run test.py
上传文件
ampy --port /dev/tty.SLAB_USBtoUART put test.py
上传同名文件会被覆盖
上传文件目录
ampy --port /dev/tty.SLAB_USBtoUART put NewFolder
也可上传至指定目录,例如新建customer文件件:ampy –port /dev/tty.SLAB_USBtoUART put NewFolder /customer/NewFolder
从Board上读取文件
ampy --port /dev/tty.SLAB_USBtoUART get boot.py
也可以保存至本地,ampy –port /dev/tty.SLAB_USBtoUART get boot.py
boot.py
其他基本指令
mkdir
ls
rm
rmdir